IN HOUSTON AND SOUTHEAST TEXAS
- Analysis of slab/floor/floor system condition.
- Analysis of elevation risk factors.
- Assessment of future-state configuration options which may be grant eligible (minimum code compliance).
- Feasibility of elevation.
- Analysis of project scope to meet minimum code requirements.
Measurements and photos are taken at the initial visit which are vital to the engineering, design, and construction. The construction process is key, and this section explains how we approach each step and its associated components and processes. It is an example of the detail and thoroughness we provide in planning and executing every portion of a project.
1. Pre-Construction Activities
An initial Elevation Certificate (EC) and lot survey are ordered. This will show the Base Flood Elevation (BFE; box B9 on the EC) and the current elevation of the house (top of bottom floor, box C2.a). This information determines the minimum height the house will be raised. Engineering can then be finalized, and a set of stamped drawings submitted for construction. Once we are issued a permit, the next stage will start.
2. Site Preparation
8-1-1 is called so that underground utility services can be marked. Protective fencing is put up around the property and a portable restroom ordered. If there is concrete that needs to be cut to allow the house to be raised, such as along the driveway, the front or back porch, or around the garage, it is done so at this point. Clean, straight cuts are preferred to jackhammering if the situation allows.
Subterranean Pilings
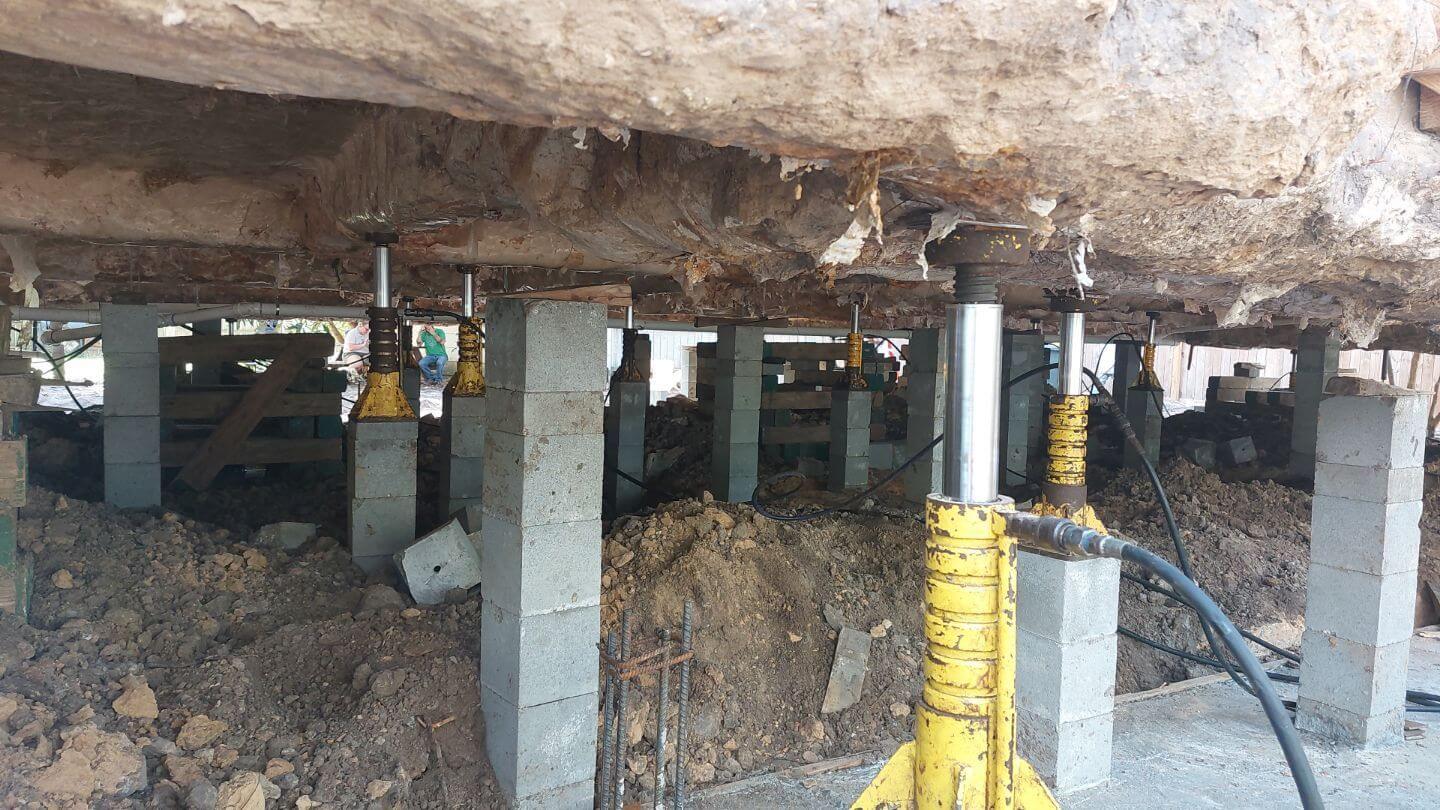
Subterranean pilings are installed under the house. Each piling is a series of concrete segments with rebar dowel pins down the center for alignment. Steel segments may be utilized along with the concrete segments to achieve a greater piling depth, if required. When installing subterranean pilings, it is imperative that that they be installed to a proper depth to minimize the likelihood of continued foundation movement. Certain soil types are very susceptible to moisture and drought. When the ground is saturated, it expands. When there is a long period of drought, the soil contracts. The depth of this “moisture affected zone” of the soil from the surface varies by location. The soil below the moisture affected zone tends to be more stable. Installing piles which reach stable soil is vital for foundation stability.
These pilings are installed five to six feet apart under the perimeter and interior grade beams of the foundation. We tunnel and excavate to locate all the interior grade beams so pilings can be installed. Each piling is hydraulically “pushed” into the ground until the proper depth and/or a not to exceed pressure is reached. When each individual segment is added to the pile, it is made square and level before it is pushed down. Any existing bell-bottom piers are broken loose. Cribbing, which are a series of 4 ft long, solid wooden posts stacked in square arrangements, are set in place which will help support the house as it is raised. These are located under the house and around the perimeter of the house.
House Raising
Most of the plumbing is under the foundation and will separate as the house is raised. However, all plumbing accessible on the outside of the house, such as the gas line, will be disconnected by the plumber before the lift occurs. The electrician will disconnect any electrical lines necessary to raise the house. Any underground service or lines running through a breezeway between the house and garage will be severed and prepared for a reconnection once the house is in the air.
Utilities
We strive to have all the utilities reconnected as soon as we can after the house is lifted allowing you to move back in as soon as possible. The electrician will reconnect any electrical connections or wiring that were severed to raise the house. The plumbers can immediately start reconnecting water, sewer, and gas lines. The plumber and electrician will schedule inspections with city officials directly. No work should need to be done to the HVAC or outside A/C condenser. The reason is because we keep it all connected throughout the lift process. The A/C is supported and lifted with the house and, therefore, it does not need to be disconnected and drained.
A unified jacking system is used to raise the house. A series of hydraulic jacks are installed under the house on roughly every other piling. Each has a hose connecting it to the unified jacking machine positioned adjacent to the house. The jacks work in unison and are monitored in real-time by pressure gauges on the jacking machine. Before the first “push”, all the jacks and hoses are inspected to ensure there are no leaks or loose connections. They are then slowly pressured up until each shows a steady reading on the pressure gauge.
If one spikes or drops to zero, the system can be immediately stopped, and the problem addressed. A higher pressure could mean one or more jacks are lifting a heavier load, such as under a fireplace. More jacks can be added to distribute the load. A drop in pressure could mean a hose has come loose or isn’t connected well.
The lift process is controlled and methodical. This maximizes safety and greatly minimizes any risk to the house and its contents. The lift happens in a series of eight inch (8”) “pushes” (the same height as a pile block). After a “push”, blocks are added to each pile that does not have a jack and wooden shims installed between the piling and the foundation. Pressure is relieved on the jacks, a pile block is added under the jacks, and the jacks are reset. The process of inspecting each jack and slowly pressuring them up again occurs and then the next “push” happens. This series of events continues until the house is raised to the required height.
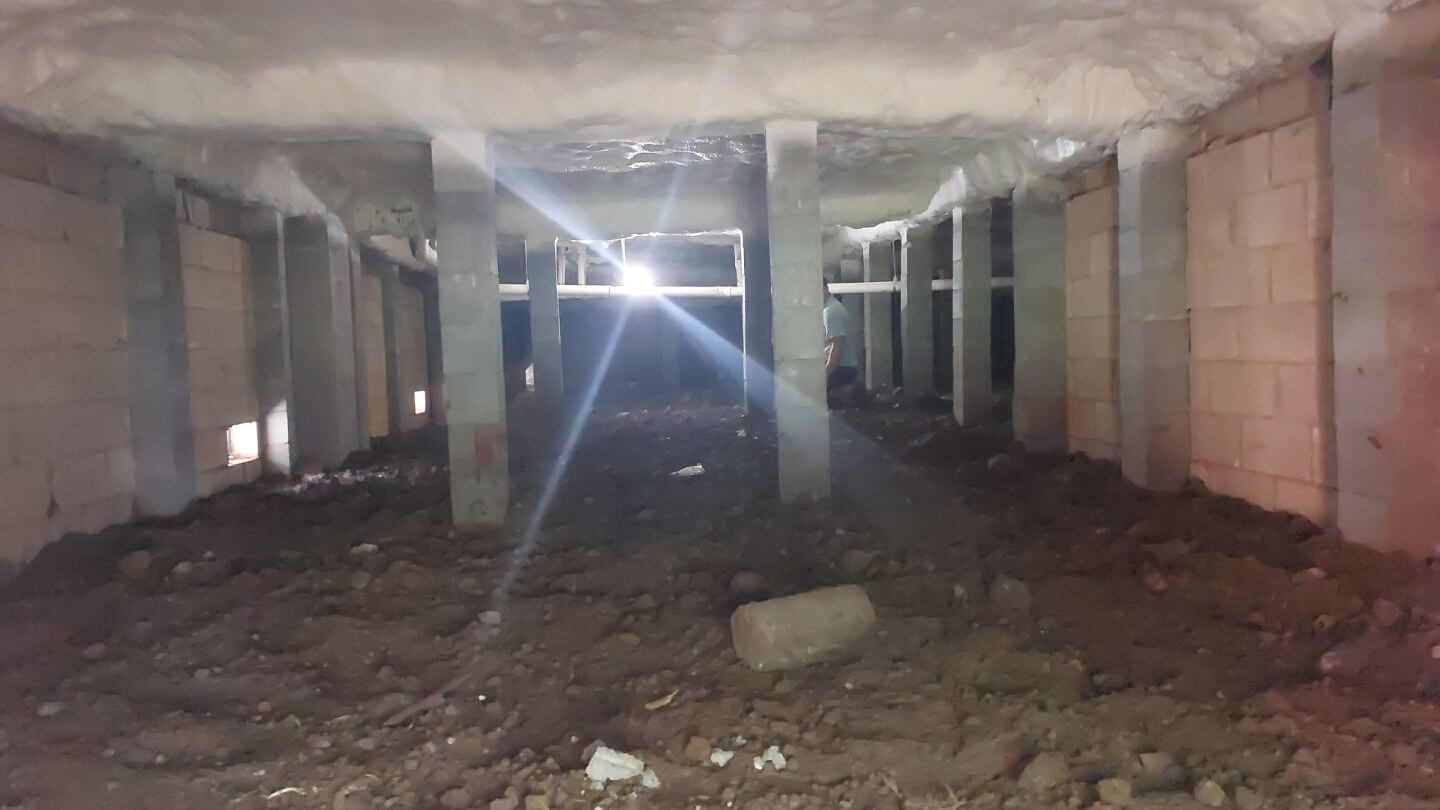
Once the house is at its final lift height and all the blocks for each pile are in place, metal shims are installed. These are hammered into place between the top of the block piling and the elevated foundation grade beams to make a good, solid connection between the two. Cribbing is left in place under the house until the structural foundation components are built. The dirt which was excavated during the initial tunneling is placed back under the house, or “backfilled”. When we backfill, we crown the dirt under the middle of the house so that it encourages runoff out from under the house during a flood event. An “Under Construction” EC is also ordered at this time to verify the house was raised the requisite amount.
Foundation
The foundation has many components, and they are the next items to be built. Concrete grade beams, often referred to as “footings” in this industry, are installed around the perimeter of the house. The footings are typically 24” wide by 12” deep with rebar. These footings bring rigidity to the structure tying the perimeter pilings together. The footings also provides a surface upon which to build a structural block enclosure wall. Interior footings may be installed under the house, but it is at the discretion of the engineer of record and is dependent upon the size of the house and how high it is lifted. Before concrete is poured, the engineer of record and a city official are called out for inspection.
- 16” x 16” concrete columns are installed under the house.
- While the block pilings support the weight of the house, the columns provide lateral support against high wind and flood conditions.
- These columns can be formed or built up with pilaster blocks. A cage of rebar is located in the center of the columns.
- The rebar is set in place with the footing rebar before the footing concrete is poured.
- The cage is then built up and the rebar is doweled into the elevated grade beam and set with epoxy.
- An engineer and city official are called out for inspection.
- The column is then filled/poured solid with concrete.
Steel beams supported by block pilings may need to be installed under the house to support any large, unsupported slab spans. Metal shims are put in place between the slab and top of the steel beam. The top of the beam is grouted to make solid contact between the slab and the full length of the beam. Once the house is raised, the engineer will inspect and determine how many steel beams are necessary and at what locations. The tops of each piling are grouted to encase the steel shims and to make a solid connection with the elevated grade beams. A set of temporary steps can also be installed at this stage for access into the house.
Insulation
Insulation is installed under the livable areas of the house. Up to two inches (2”) of closed-cell insulation foam is applied to the underneath of the elevated slab. It makes an incredible difference in temperature control helping the house to stay cool in the summer and warm in the winter.
Structural Enclosure Wall
Structural enclosure walls can be built around the crawl space of your elevated home. Each row of blocks in the wall is stacked in staggered formation and set with mortar. The top of the wall has an inclined 2 1⁄4 x8x16 solid cap block which makes the transition between new wall and existing house façade.
The wall is reinforced with rebar and each cavity containing rebar is filled with concrete. The rebar is set in the footing and doweled into the elevated grade beam and set with epoxy. The wall is constructed with expansion joints. The expansion joints and the top of the wall between the cap blocks and the house are filled with caulking. This helps mitigate cracks, creates some water sealant, and helps with insect control.
The wall will include flood ventilation. Comal prefers to use Smart Vents which have a coverage rating of 200 sq ft per vent. The quantity is determined by the enclosure area. Each vent opening in the wall will have a steel lintel. This is a flat piece of steel incorporated into the wall to help support the weight of the blocks above the vent. An access door is also installed in the wall.
Once the wall construction is complete, the dirt under the house is spread out once more, if necessary, to ensure proper runoff during a flood event. Comal prefers to power wash the finished wall to wash away any excess mortar and to enhance the visual appeal of the wall. Excess construction debris is cleaned up and removed.
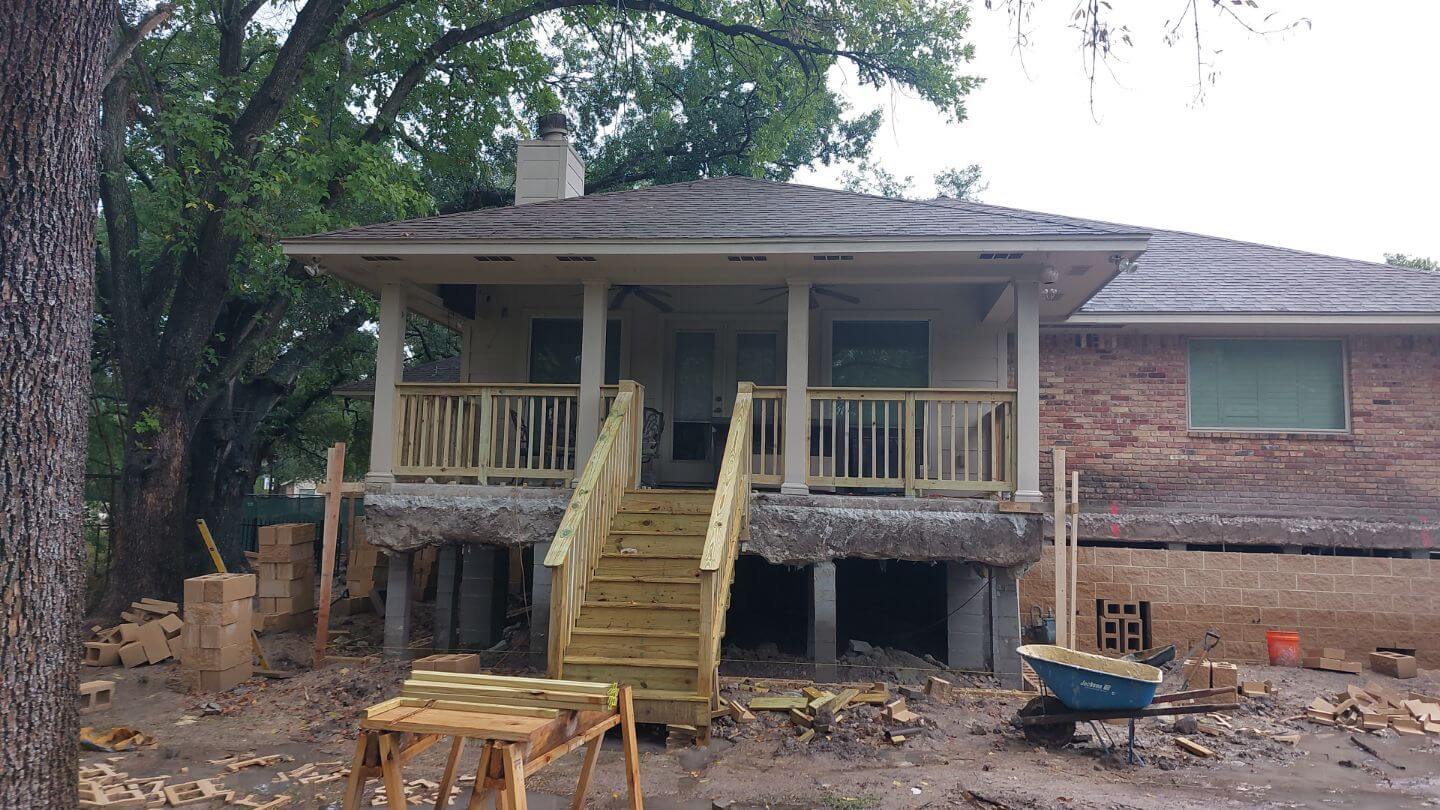
Landings & Steps
Code compliant landings, stairs, and railing are installed for ingress/egress. Pressure-treated lumber is used for this construction.
As licensed engineers, Comal is intimately familiar with the code requirements for these items such as minimum landing depth, railing height, balustrade spacing, stair height, and tread depth. Our carpenters know this, as well.
Flatwork & Restoration
Any concrete that was cut to facilitate raising the house is replaced. Downspouts are extended to average grade and new sod can be installed around the perimeter of the house. A final clean up is performed and the final EC is ordered. A 10-2-1 warranty for the elevated house foundation is provided to the homeowner as part of the project close out.
Comal prefers StrucSure as the warranty provider. However, they list it as 1-2-10 on workmanship, mechanical systems, and the structural foundation, respectively.